How to Fix a Defective Window Switch
#1
 04-24-2010, 01:38 AM


How to Fix a Defective Window Switch
Note: I did this for my 2007 Ford F-150, but it should be nearly identical in terms of process for other vehicles.
Background:
A few months ago my passenger side window switch became defective. It was capable of rolling down the window, but was not able to roll it back up. I had to do it from the driver's side. I could still completely control the window from the driver's side, though, so I knew it was an issue with the switch. It's been a busy semester, so I had decided to put off looking into it until summer.
Well, today I was taking the dog to the park so I had my windows down, enjoying the day. When I got to the park, my driver's side window would not roll up. Same issue as the passenger's side; it would roll down but not back up. It took some playing with to get it to roll back up. In other words, I sat there for five minutes flipping the switch until it went back up. It is supposed to rain tomorrow, so I decided to leave it go until I had more time to look at it.
Sooooo that didn't work out so well. Being the intuitive mind that I am, I decided to check them out. The driver's side costs ~$70 to replace from Amazon, and the passenger's side costs $40, also from Amazon. I don't have $110 laying around to spend on window switches, so I wanted to try it myself. I did in fact figure out what was wrong, and fixed it. The cause of the issue was bad contact points. This is usually the case in terms of window switches becoming defective. All you need to fix this is maybe one or two small screwdrivers, and something to wipe off the contact points with (I used Cu Tips). This is a short tutorial of how to repair defective window switches with this issue.
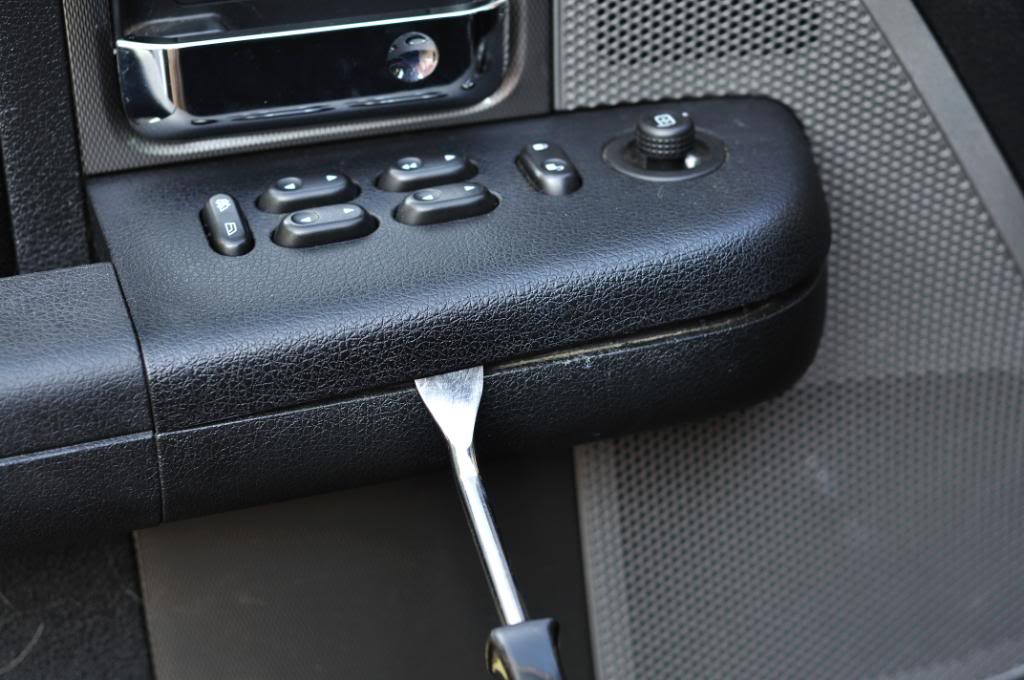
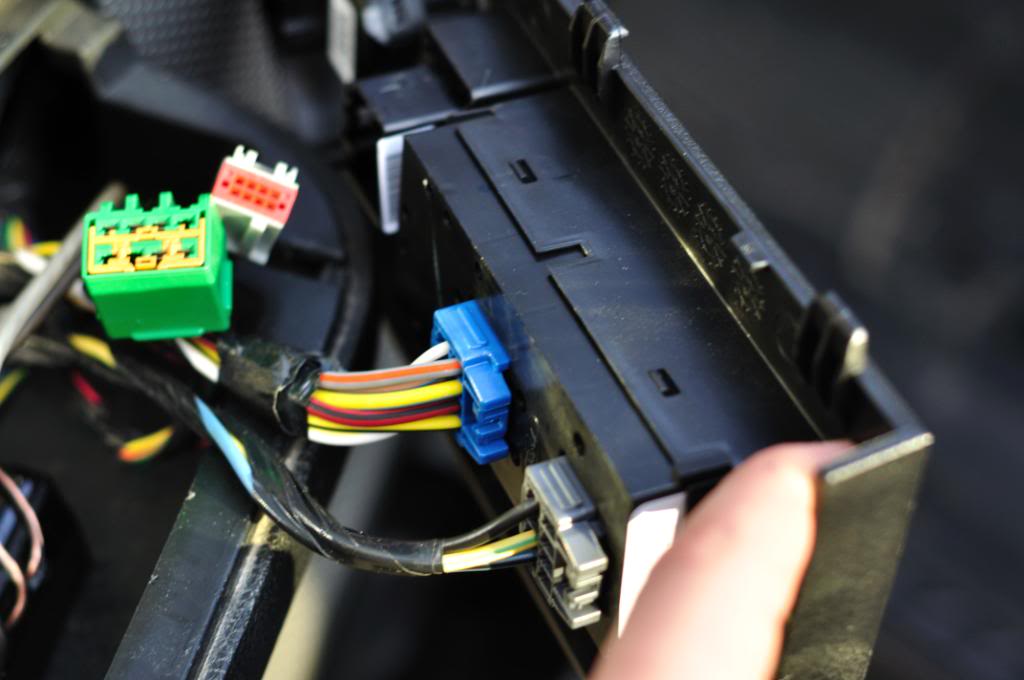
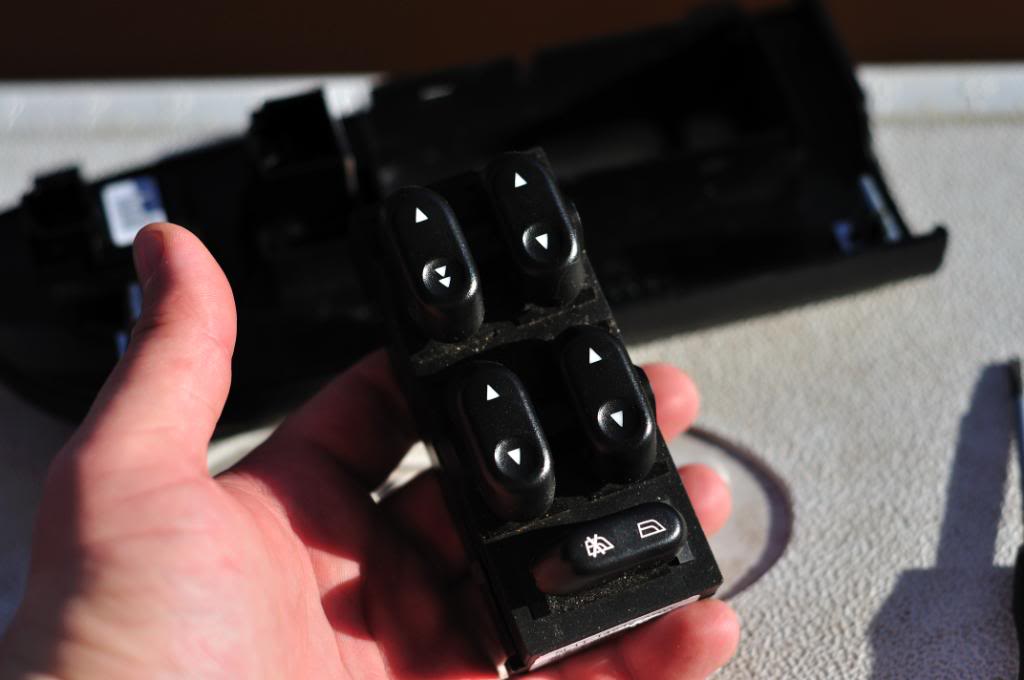
First Step: Remove Window Switch
This step will vary based on your vehicle. You should be able to pry up a section of door panel to gain access. Just unhook any connectors necessary and use a small screwdriver to pry apart any snap-fits. You only want to be dealing with the switch board itself.
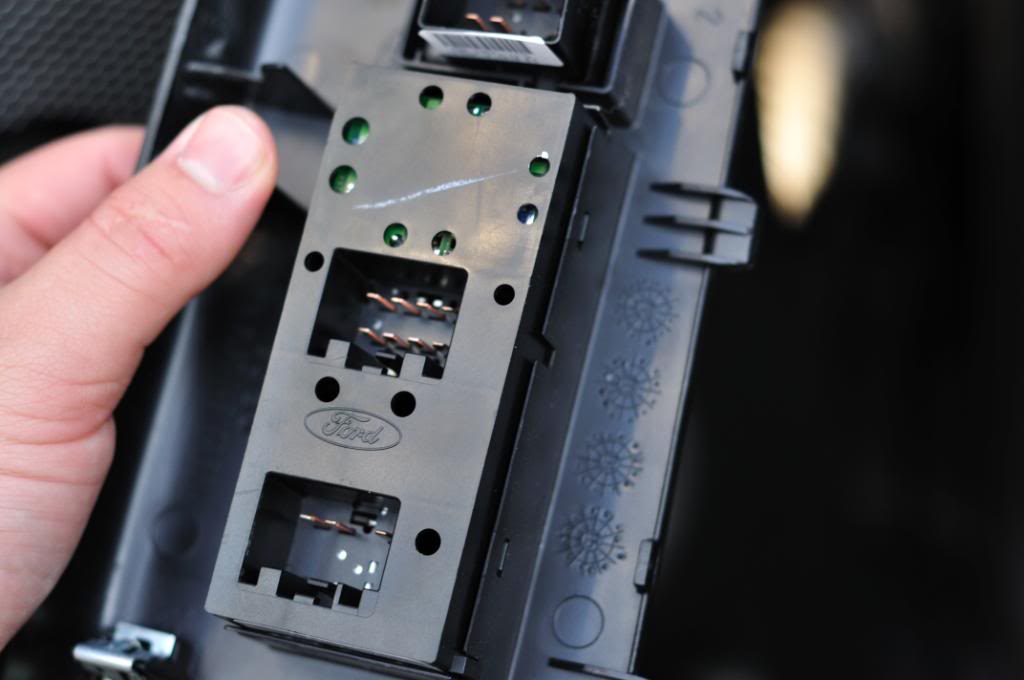
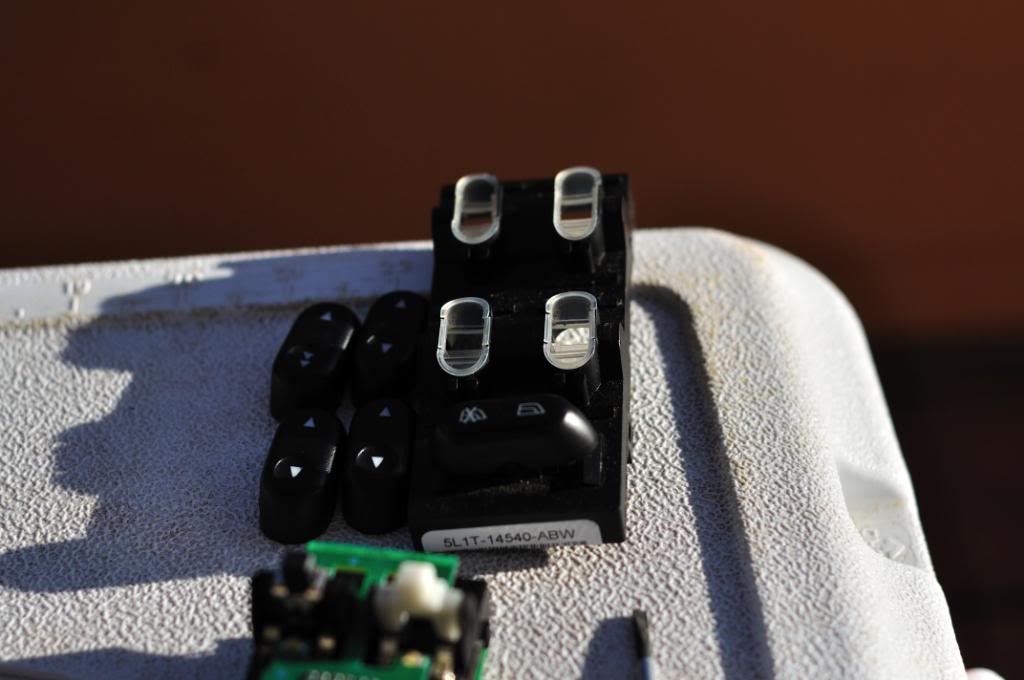
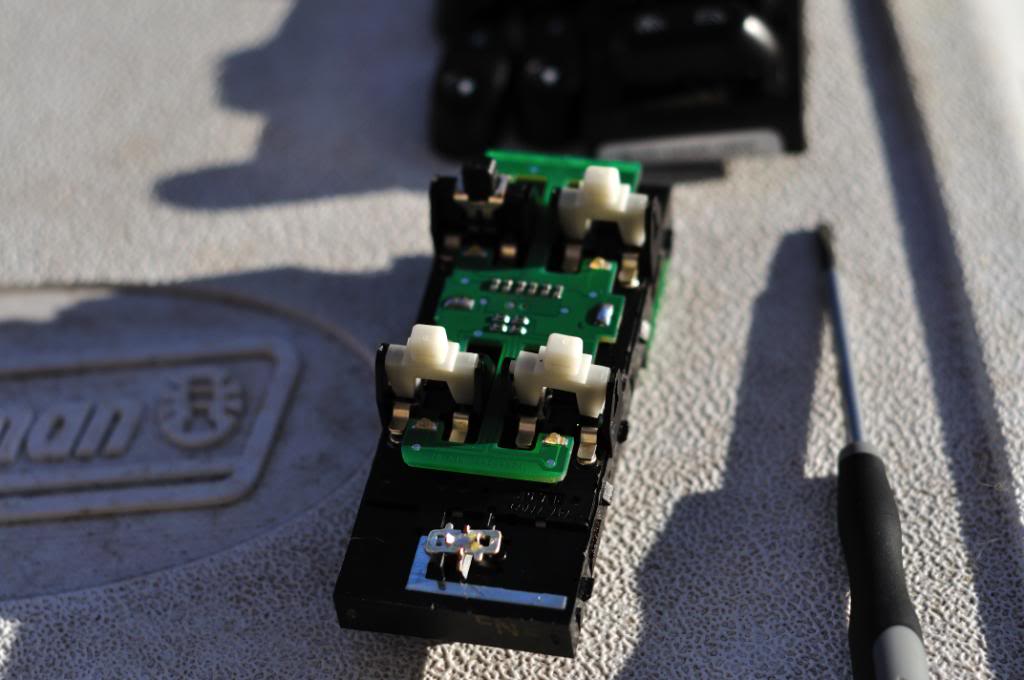
2nd Step: Gaining Access to Switch Internals
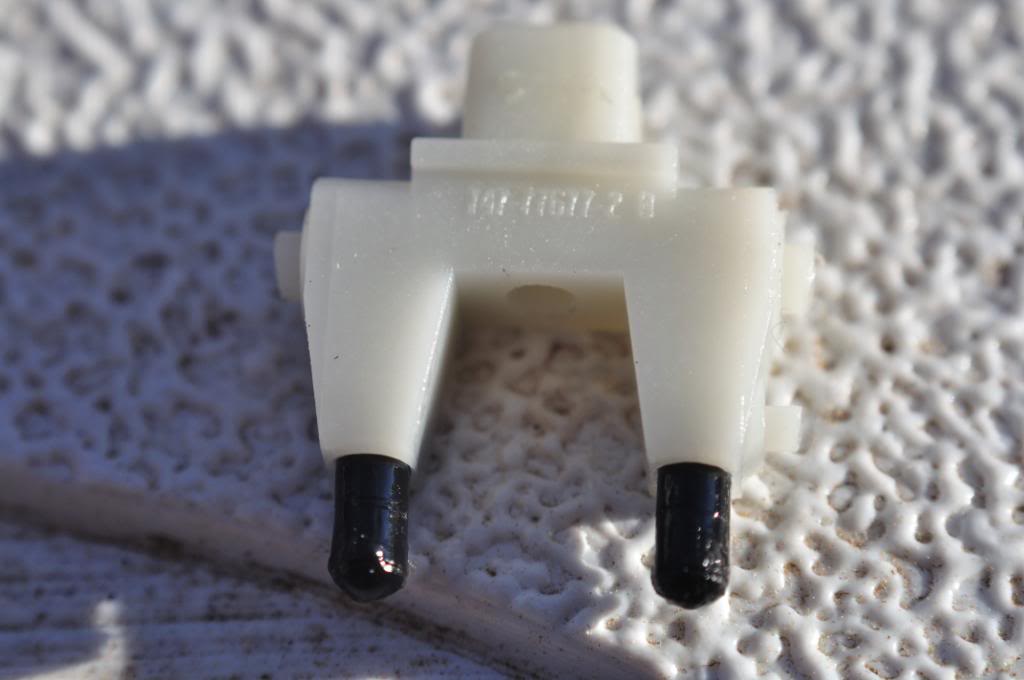
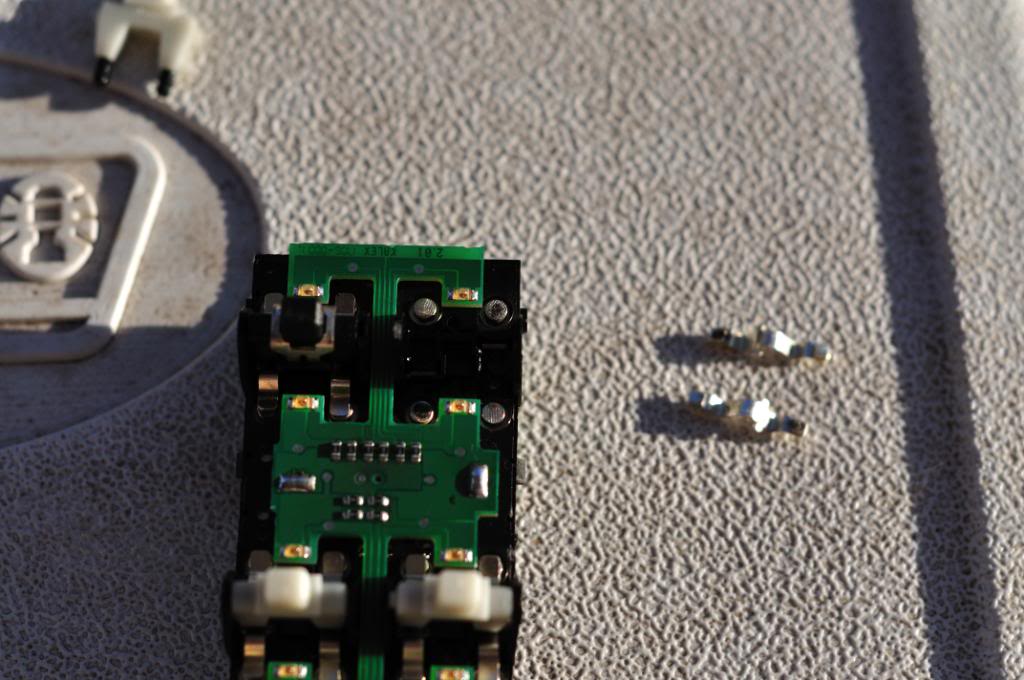
The caps over each switch (your window buttons with up and down arrows) will pry off easily. After those are off, remove the actual switches (white pieces for my truck). These were also snap-fits, so use one of the small screwdrivers to pry them out. Now remove the small metal tabs underneath. These were simply laying in position, so flipping the whole configuration over will allow them to fall out.
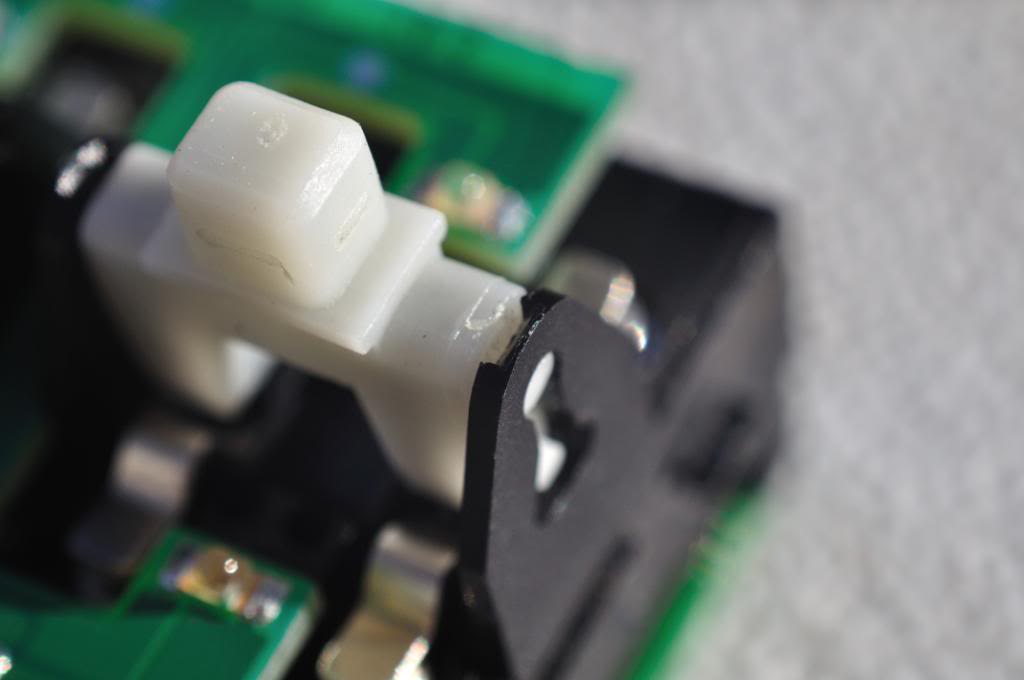

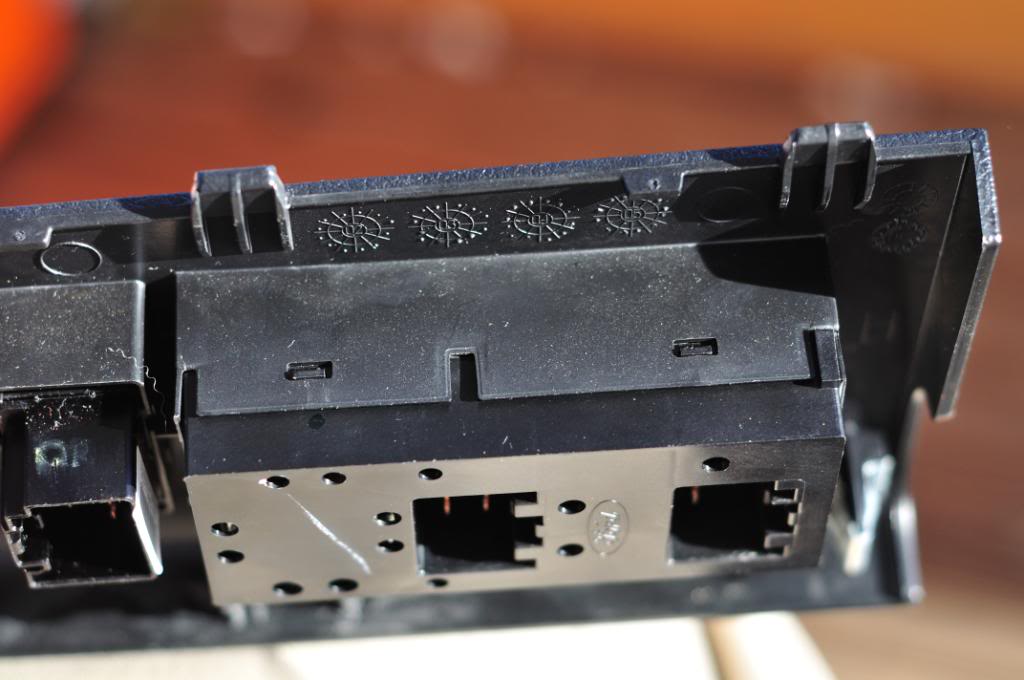
3rd Step: Diagnose your Situation
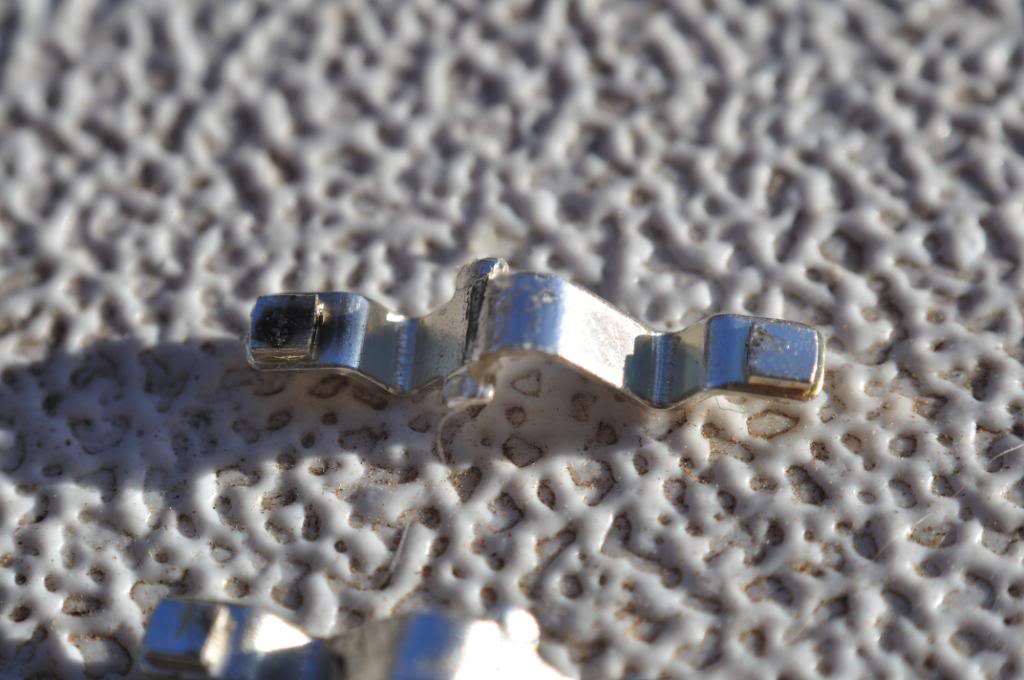
You may or may not have bad contacts. You will know immediately. If not it is something else, so do a little research and see what you need to do. If you are at this point you obviously wanted to try a DIY fix before paying over a hundred bucks for new switches. It's worth trying to fix while it's apart. If it doesn't work, you're out nothing and you have to buy new switches anyway. Worth a shot, right? Here is a look at a good vs bad contact.
Last Step: Fix it!
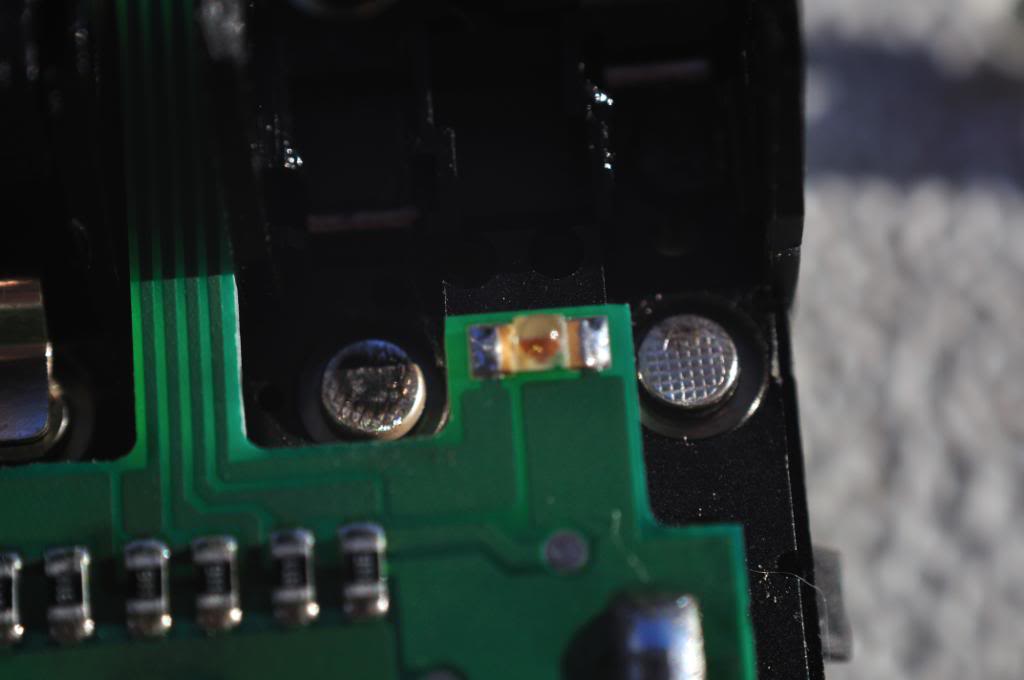
It's quite obvious the problem here was bad contacts. All I did was scrape off the crud and afterward wiped the contacts off. Use whatever tool can get the job done. If at all possible make the contact points as smooth as possible for a clean connection.

Just do everything in reverse to put it all back together and go test it. For me, it worked for both the driver and passenger sides! Good luck. This is a fairly straightforward fix if you're comfortable doing this. I had to take new pictures since I lost the old ones, and this whole process took me less than 10 minutes.
-Matt
Background:
A few months ago my passenger side window switch became defective. It was capable of rolling down the window, but was not able to roll it back up. I had to do it from the driver's side. I could still completely control the window from the driver's side, though, so I knew it was an issue with the switch. It's been a busy semester, so I had decided to put off looking into it until summer.
Well, today I was taking the dog to the park so I had my windows down, enjoying the day. When I got to the park, my driver's side window would not roll up. Same issue as the passenger's side; it would roll down but not back up. It took some playing with to get it to roll back up. In other words, I sat there for five minutes flipping the switch until it went back up. It is supposed to rain tomorrow, so I decided to leave it go until I had more time to look at it.
Sooooo that didn't work out so well. Being the intuitive mind that I am, I decided to check them out. The driver's side costs ~$70 to replace from Amazon, and the passenger's side costs $40, also from Amazon. I don't have $110 laying around to spend on window switches, so I wanted to try it myself. I did in fact figure out what was wrong, and fixed it. The cause of the issue was bad contact points. This is usually the case in terms of window switches becoming defective. All you need to fix this is maybe one or two small screwdrivers, and something to wipe off the contact points with (I used Cu Tips). This is a short tutorial of how to repair defective window switches with this issue.
First Step: Remove Window Switch
This step will vary based on your vehicle. You should be able to pry up a section of door panel to gain access. Just unhook any connectors necessary and use a small screwdriver to pry apart any snap-fits. You only want to be dealing with the switch board itself.
2nd Step: Gaining Access to Switch Internals
The caps over each switch (your window buttons with up and down arrows) will pry off easily. After those are off, remove the actual switches (white pieces for my truck). These were also snap-fits, so use one of the small screwdrivers to pry them out. Now remove the small metal tabs underneath. These were simply laying in position, so flipping the whole configuration over will allow them to fall out.
3rd Step: Diagnose your Situation
You may or may not have bad contacts. You will know immediately. If not it is something else, so do a little research and see what you need to do. If you are at this point you obviously wanted to try a DIY fix before paying over a hundred bucks for new switches. It's worth trying to fix while it's apart. If it doesn't work, you're out nothing and you have to buy new switches anyway. Worth a shot, right? Here is a look at a good vs bad contact.
Last Step: Fix it!
It's quite obvious the problem here was bad contacts. All I did was scrape off the crud and afterward wiped the contacts off. Use whatever tool can get the job done. If at all possible make the contact points as smooth as possible for a clean connection.
Just do everything in reverse to put it all back together and go test it. For me, it worked for both the driver and passenger sides! Good luck. This is a fairly straightforward fix if you're comfortable doing this. I had to take new pictures since I lost the old ones, and this whole process took me less than 10 minutes.
-Matt
Last edited by mblouir; 05-19-2010 at 07:32 PM.
The following users liked this post:

#3
04-24-2010, 09:38 PM
#4
04-24-2010, 10:33 PM

#5
04-24-2010, 10:39 PM

Thanks Matt... I've been having this problem on my driver side window for a while.. tried to take it a part this past summer, ran out of time and got frustrated trying to get theme three small clips off of the black casing.. will try again soon! good write up! 
#6
04-24-2010, 11:07 PM
#7
04-25-2010, 12:10 PM

Senior Member
Join Date: Nov 2008
Location: Youngstown, Ohio
Posts: 156
Likes: 0
Received 0 Likes
on
0 Posts
Trending Topics
#8
04-25-2010, 12:35 PM
From what I've been told, this is caused by a carbon build-up due to the quick bursts of current going through them. The quality of material will have an impact on how fast it tends to build up. Looks like we got the cheap material. Thanks, Ford!

#9
04-26-2010, 05:18 PM

Member
Join Date: Nov 2009
Location: Ottawa, ON
Posts: 79
Likes: 0
Received 0 Likes
on
0 Posts
#10
04-27-2010, 09:33 AM

Member
Join Date: Jun 2009
Location: South Carolina
Posts: 39
Likes: 0
Received 0 Likes
on
0 Posts
#11
04-27-2010, 11:53 AM

#13
04-27-2010, 10:55 PM

Senior Member
Join Date: Feb 2006
Location: Omaha, NE
Posts: 104
Likes: 0
Received 0 Likes
on
0 Posts
My switch started acting up a couple months ago and I have been avoiding it because I didn't want to buy a new switch (box). Took it apart today and cleaned off the contacts with sand paper and contact spray cleaner. A total of about 20 minutes and BAM!...it's done. Thanks for the writeup!!!! Way to Go!
#15
04-28-2010, 07:57 PM

Junior Member
Join Date: Apr 2010
Location: Georgia
Posts: 1
Likes: 0
Received 0 Likes
on
0 Posts

